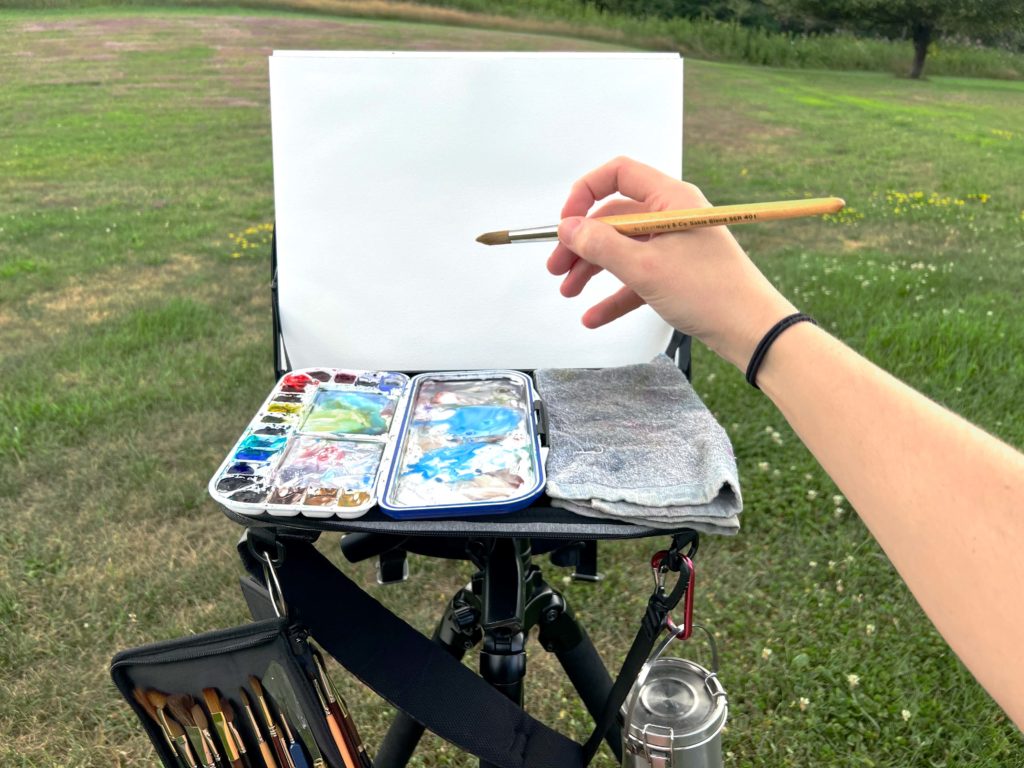
If painting outside scares you, then I’d guess the idea of painting a larger watercolor piece may not seem in the realm of reality. Before you even get to the challenges of bugs, hot sunshine, changing light, and fast-drying paint, you have to tackle the ever-present question of gear. I’d love to ease your fears by explaining how my larger plein air setup makes it easier! This setup is super supportive and allows me to go big, away from home! However it does have its drawbacks, some of which are not in my power to improve. Are they a dealbreaker? Is this the setup for you? Read on!
*None of the following links I provide are affiliated at the time of publishing, just good stuff.
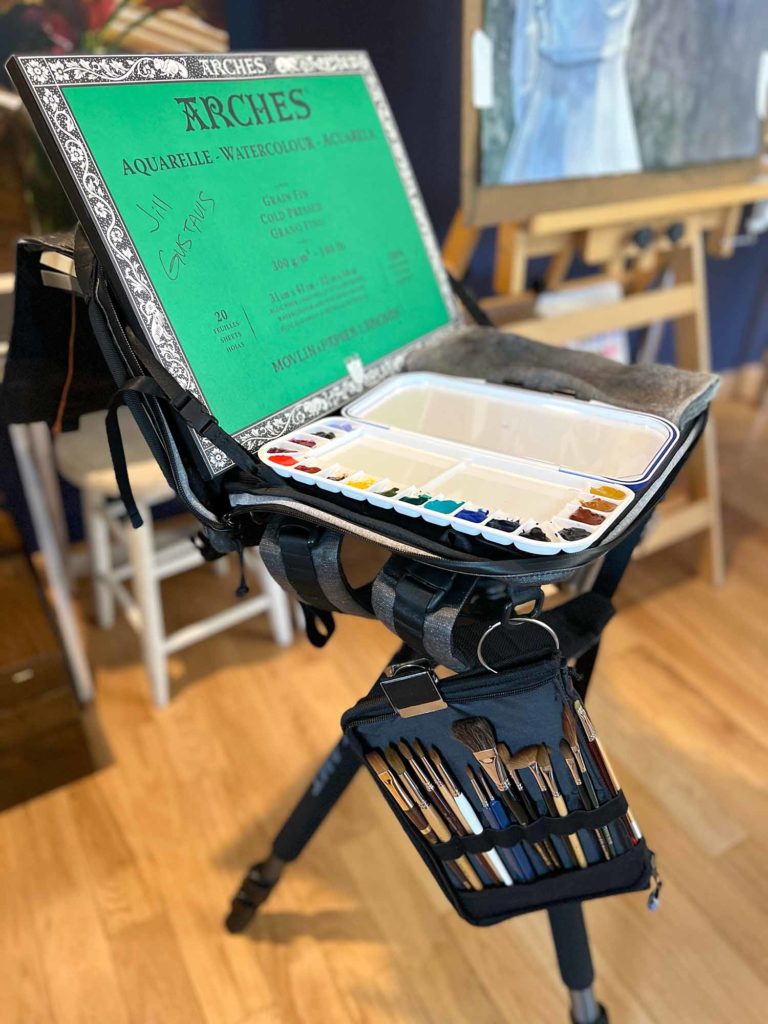
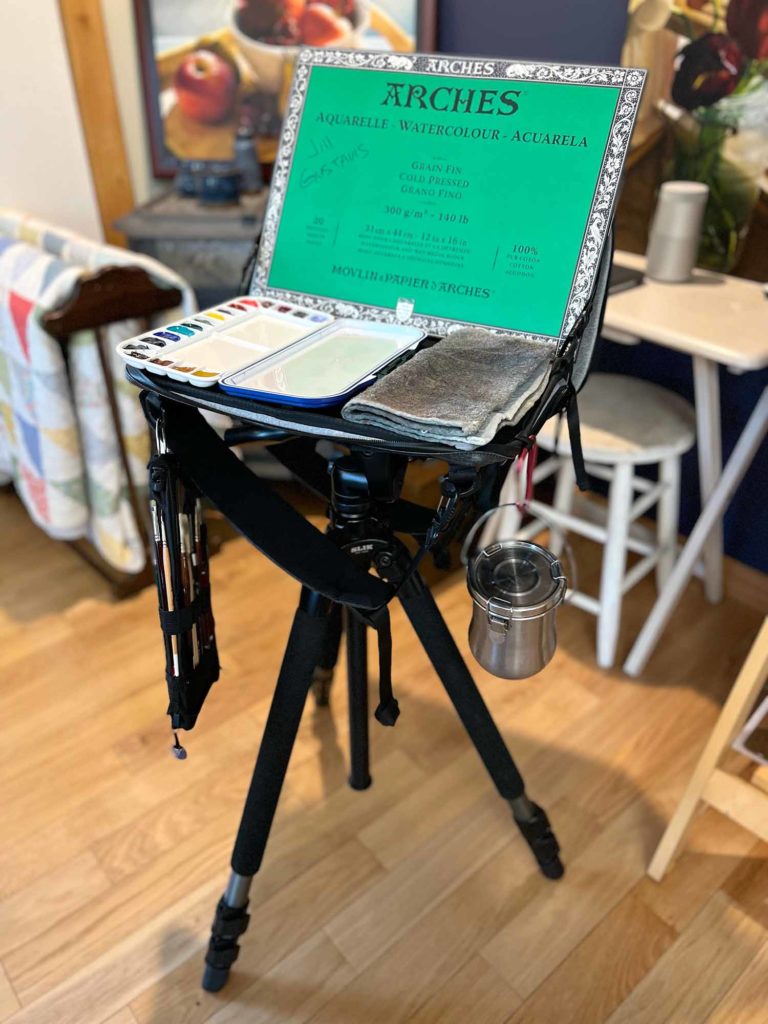
Since June I’ve been putting my larger plein air setup through its paces. Many of you have asked how I liked it and if I’d made any changes along the way. The quick answer is, not really? I kind of like it. It’s simple. It’s quick to setup, quick to break down. The gear is made to be outside, and made for painting, or for any artist really. But before I get into my opinion on it, let’s break it down into components.
Plein Air Gear I Use
Now, this just pertains to my large watercolor plein air setup. If you’re interested in something more lightweight, check out my portable watercolor landscape kit, which I wrote about last month! But, if you’re here for big painting, let’s continue.
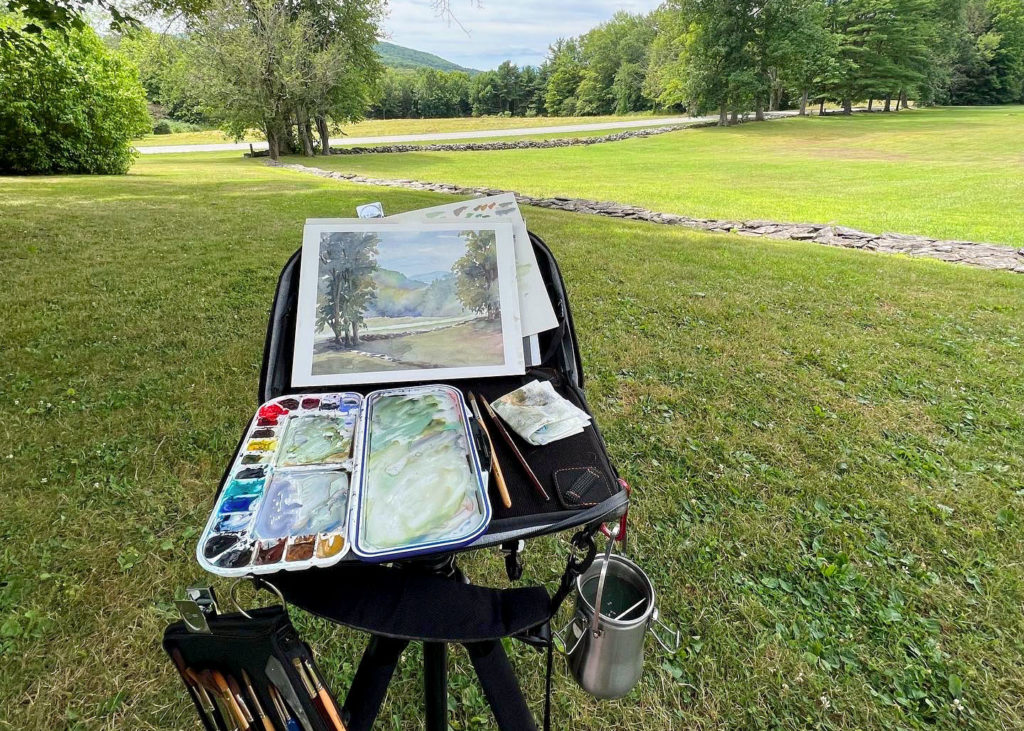
Art Satchel & Tripod Help Support Large Watercolors
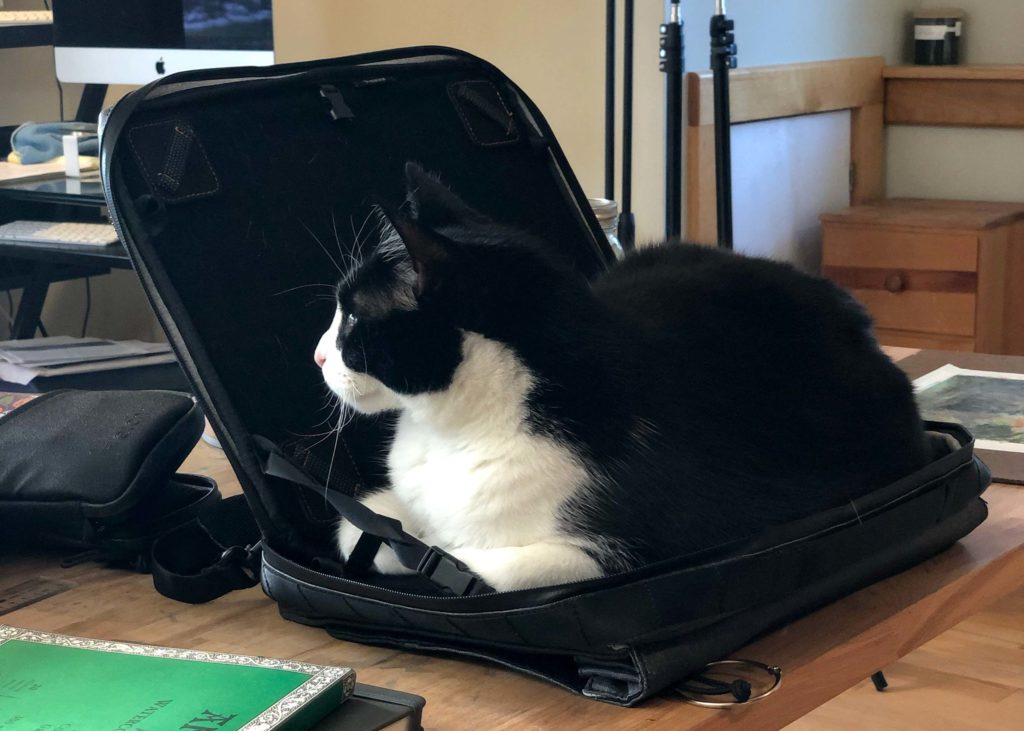
The base component of my large painting setup is the Etchr Satchel. I actually purchased mine from the original Kickstarter! It was designed from the beginning to be an artist’s bag. Not a retrofit of something else for art. The most helpful aspects for me are the tripod mount, the setup and carry configurations, and plethora of modular components. Every artist does things differently and the options here make everyone’s setup fully customizable.
This customization is also the reason it took me a few years to find my own preferred configuration. Through trial and error I found mine, by just using it. Sorry no magic quiz, or sage advice to help you speed that up, haha. My favorite and most trusted way of testing something is just plain old hands on experience. I pay attention to when/where I’m frustrated, and how that can be improved, over the long term.
Configuration
I choose to use the satchel in “laptop mode” while mounted on a tripod. Now, one of the biggest drawbacks to this setup is the weight. The satchel on its own (in this configuration) weighs 6.4lbs, due to its structure, so take that into account when pairing it with a tripod. I use a solid SLIK Pro 700 DX Tripod with 700DX 3-Way, Pan-and-Tilt Head. Let’s just say it’s not going anywhere.
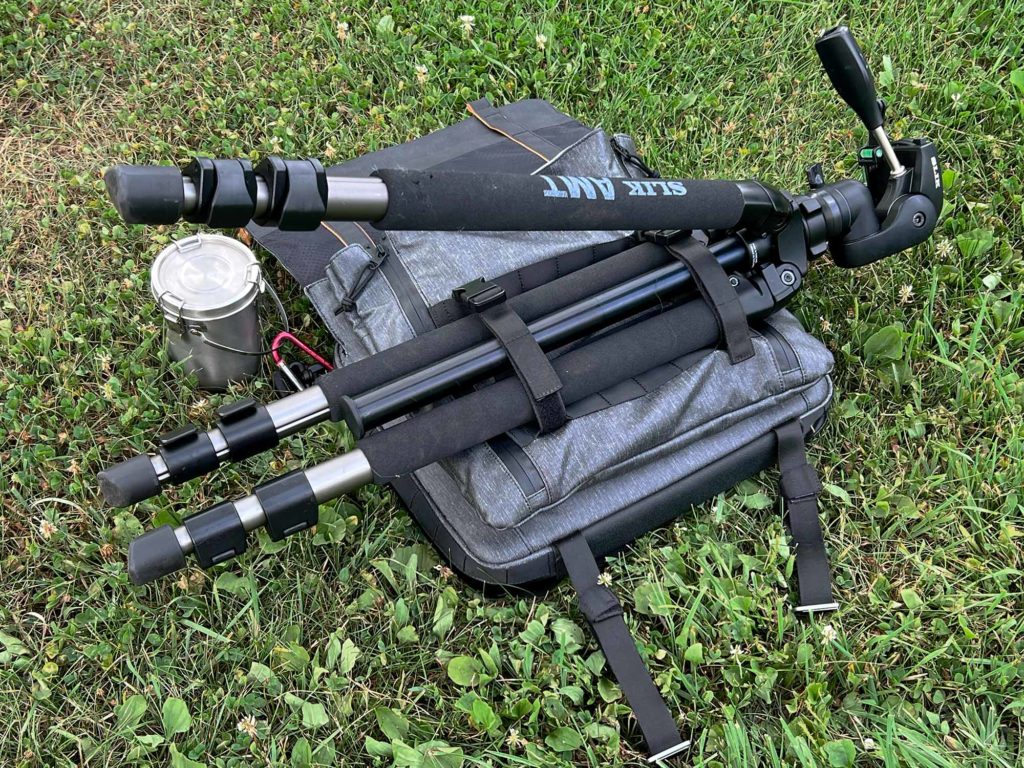
The satchel has straps under the folding cover that allow you to carry a tripod in “llama mode”. This is helpful for keeping everything on my back but does increase the weight of my overall pack. You could always carry the tripod separately if the combined weight is too much or too awkward. I manage the weight by using the backpack straps to carry the weight evenly on my shoulders. The satchel can also be set up as a messenger bag or carried like a briefcase.
Components
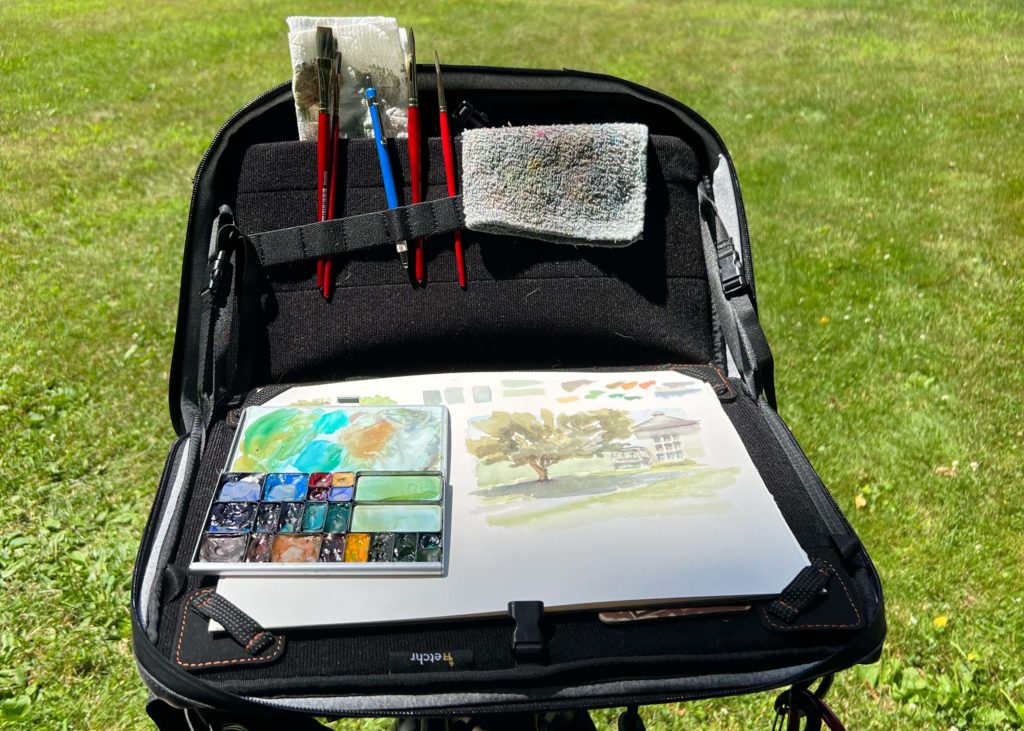
So with all the possible customizable components, how did I choose to arrange the working areas? Um, by not using too many. My bag is pretty stripped down. I prefer to carry my brushes in a zipped case and I don’t carry much loose small bits and bobs. I may use the corner holders if I’m using a pad, but blocks don’t usually need that extra tie down. If I’m painting flat, I may use a thinner brush holder on the vertical side for brushes I’m switching between.
Everything Else
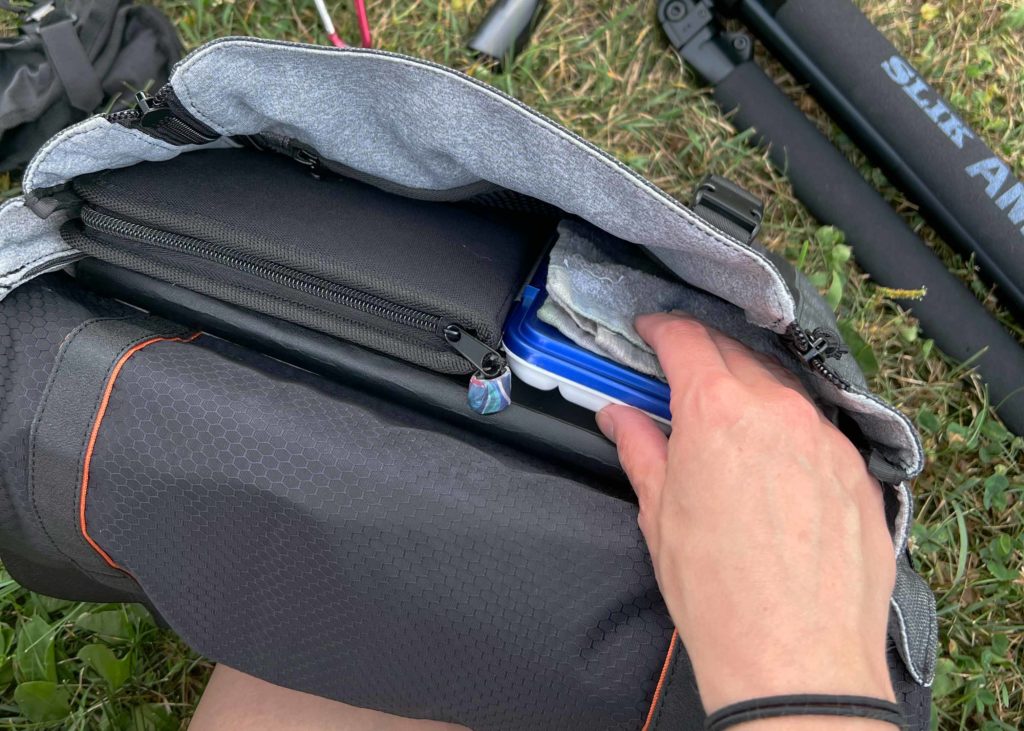
Like I said, everything else is self-contained. Any paper larger than 9×12, I have to carry separately. In the front pocket of my bag I carry my brushes, palette, a pencil/eraser, optional sketchbook, and towel. I carry the paper in the zipped working area. I carry water on the outside via a carabiner. Paper towel and artist’s tape go in the thin zipped pocket of the flap.
Large Watercolor Plein Air Setup: Step by Step
Now that we’ve covered all the components, let’s see how they all go together. This is usually what makes or breaks a plein air setup. If it’s a hassle to set up/break down, you will NOT feel motivated to go out!
Remove the Tripod & Set Up
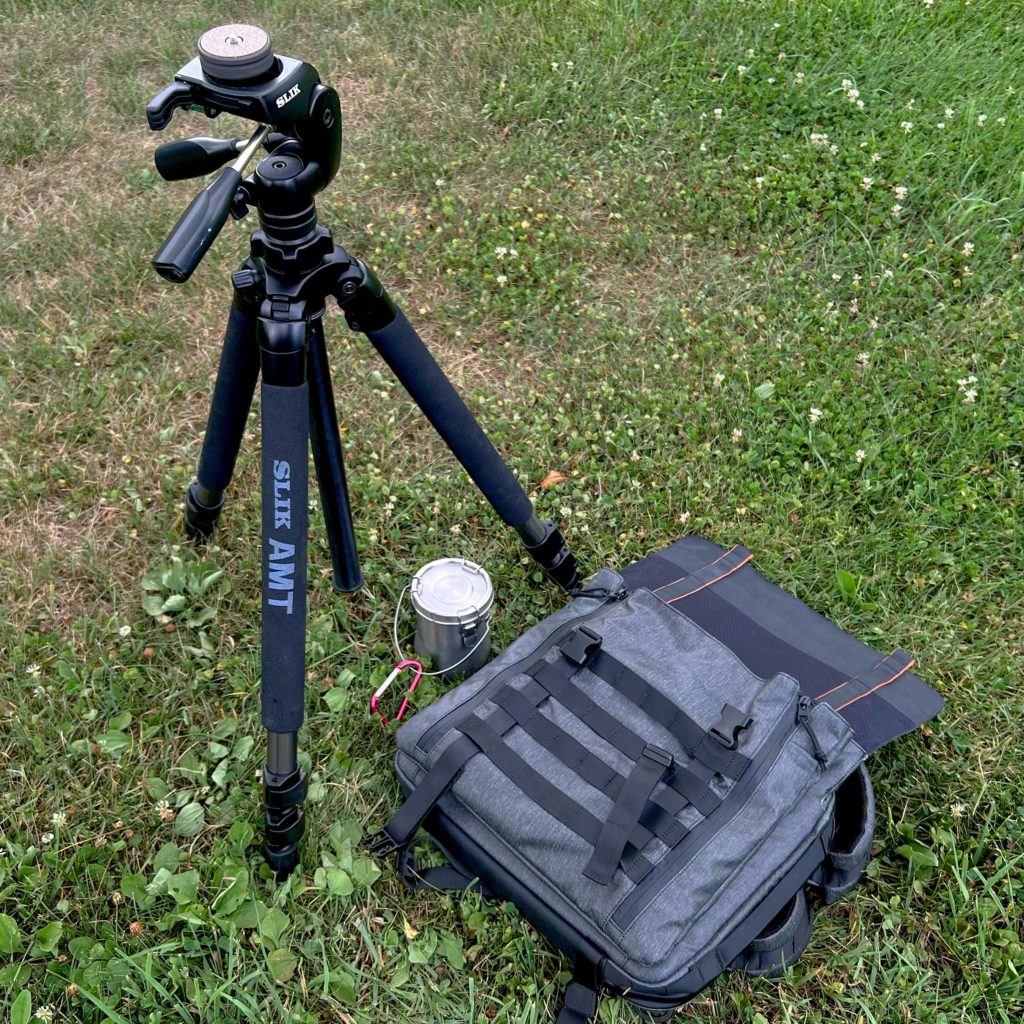
This setup height may be different depending on whether you’ll be seated, standing, painting flat, or painting vertically. Set it to your preference and don’t worry it’s always adjustable if you don’t get it right the first time. The best part about this tripod is the legs are not attached to each other, giving me more stability and maneuverability on any rugged or uneven terrain that may offer the best composition.
Open & Remove Supplies
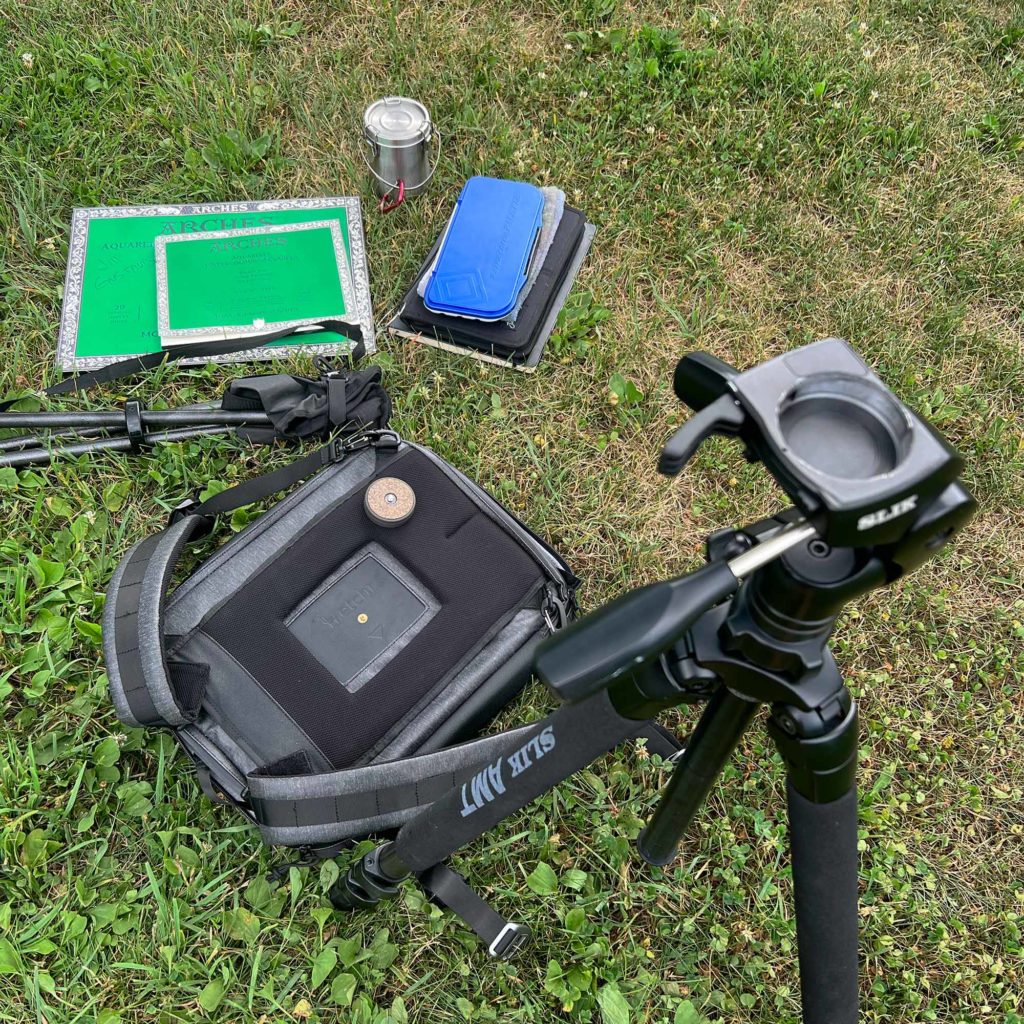
Remove everything you’ll need from the front pocket and place it on you seat or the ground. (this makes the bag less heavy to mount.) Unzip and open the working area and remove supplies from here as well.
Attach the Satchel
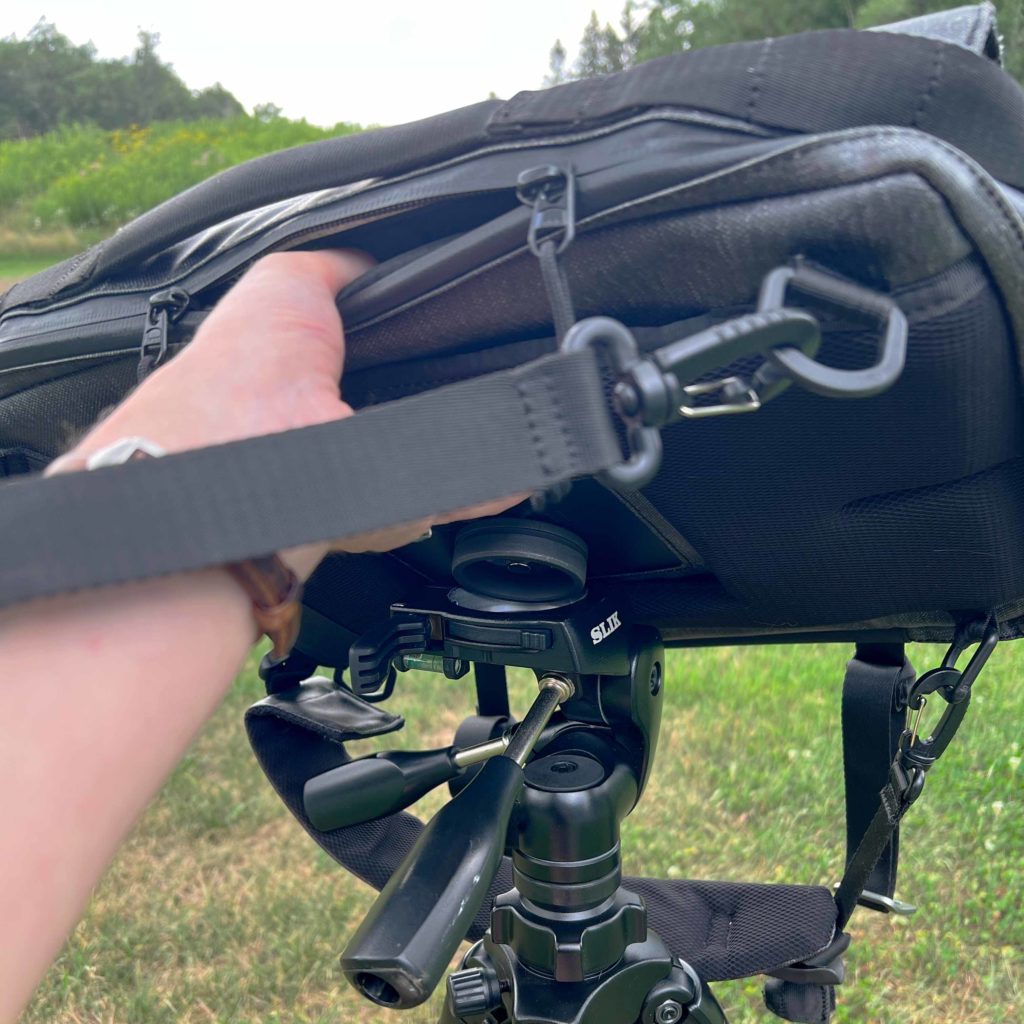
Screw the tripod connector to the satchel and with the side of the satchel that opens the work surface facing you, seat the satchel and connector on top of the tripod head until you hear it click into the pocket. Tighten any latches, etc. to lock it in place.
Set Up Working Area
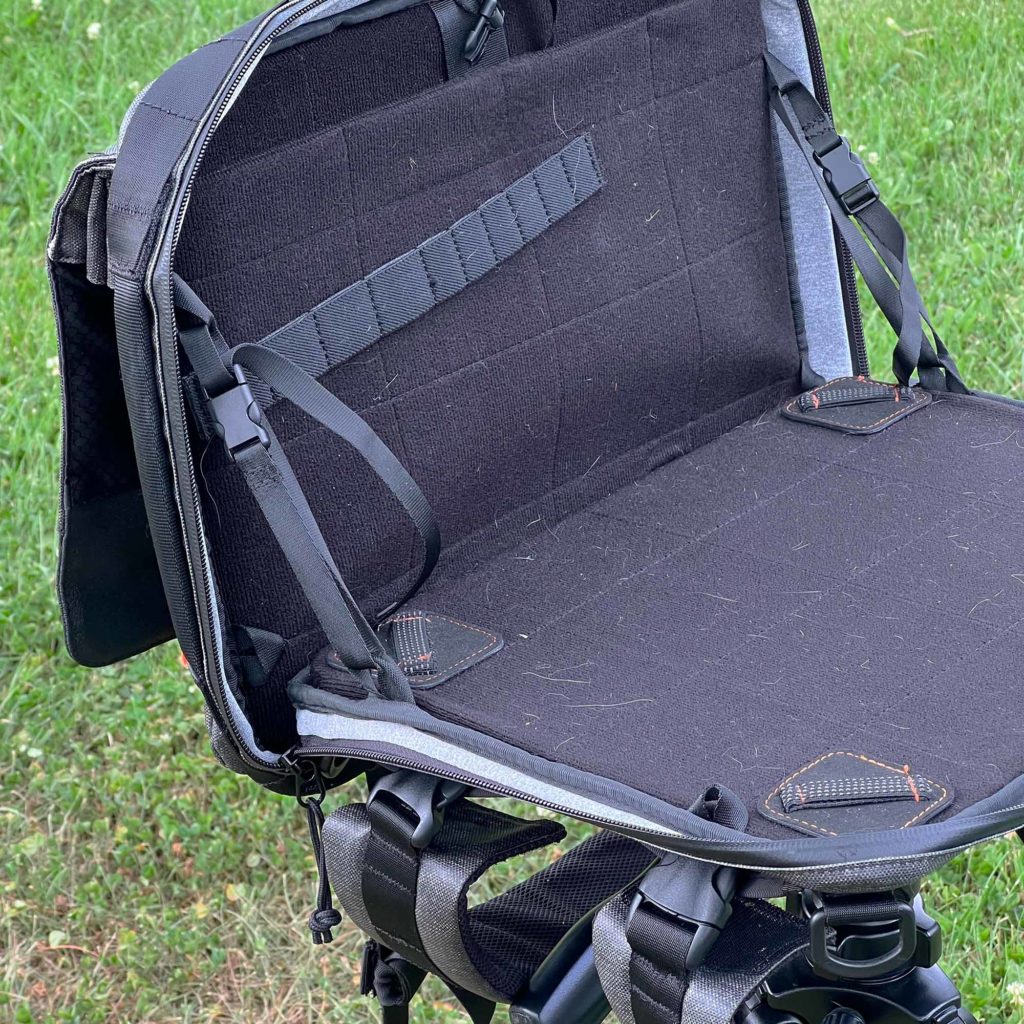
I use mine in laptop mode, so I use the clinch straps to keep tension between the now vertical front half and the horizontal working surface. Adjust any tension to get it stable. If the horizontal surface is not level, adjust your tripod head.
Attach Hanging Supplies
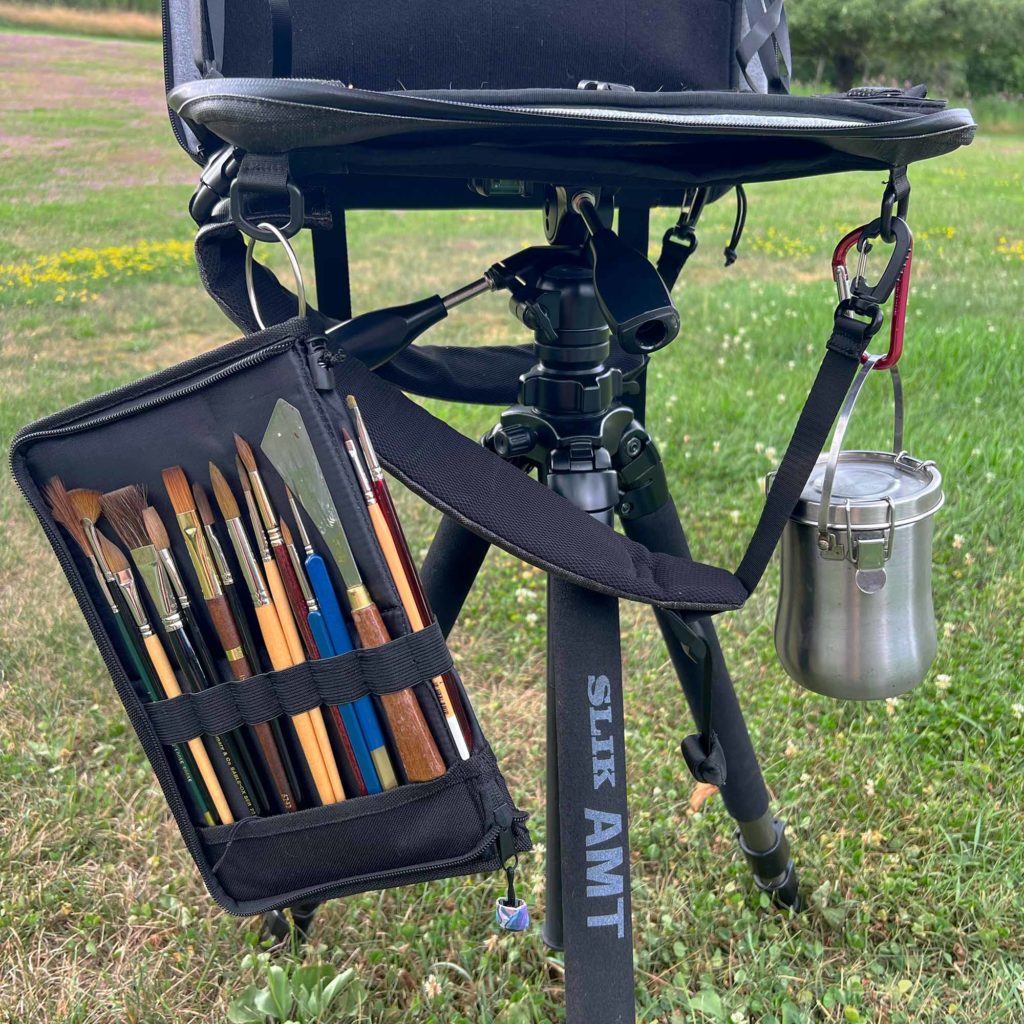
I start with the supplies I hang off the satchel. So my brush case (folded back on itself) is attached to the left side and my water container is attached to the right side (I’m right handed). If the added weight of the water knocks your level work surface askew, readjust, just be careful when you loosen the tripod head, that it doesn’t suddenly tilt in the direction of the heavy water!
Set Up Remaining Supplies
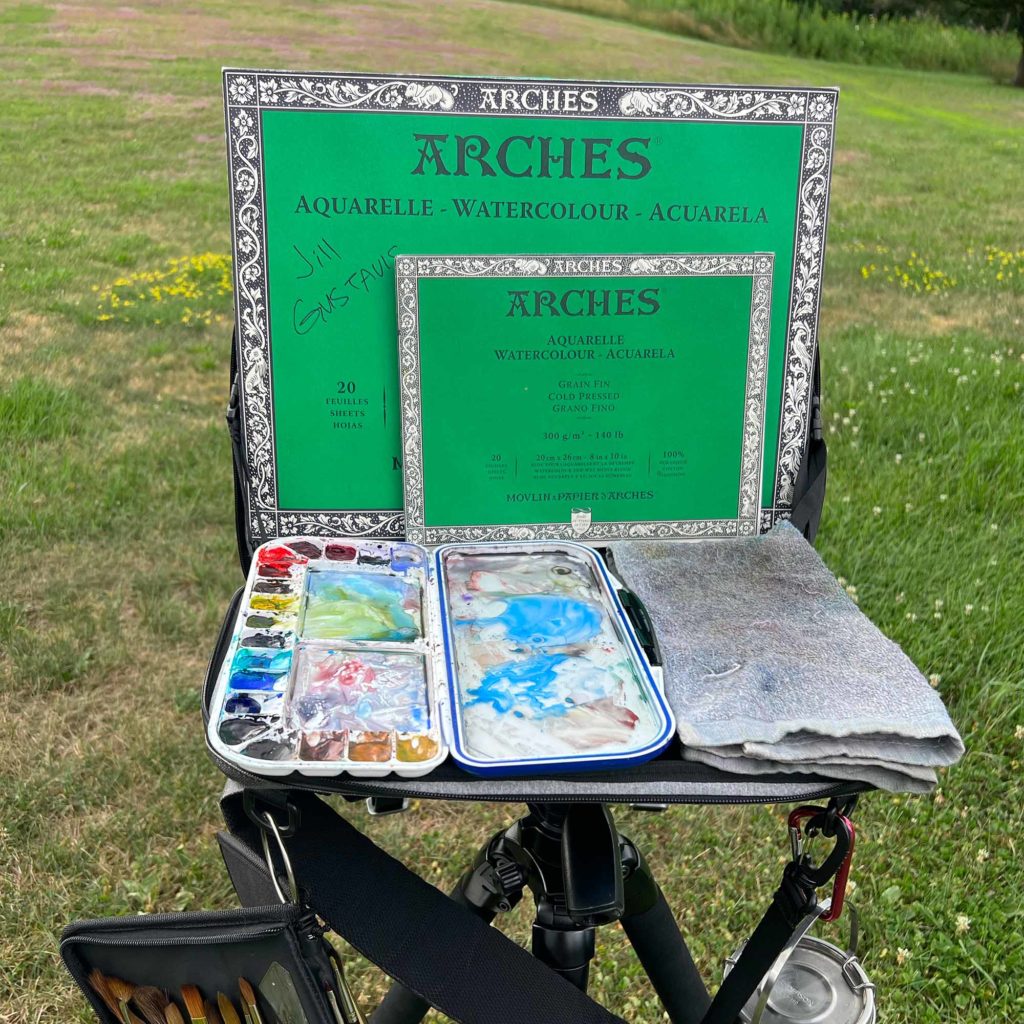
Depending on the size of the paper or if I need to work flat, I will either prop up paper vertically, against the back of the “laptop”, or leave it flat on the working surface. (A 12x16in block just fits between the two laptop cinch straps keeping it secure.) I usually just hold my palette, but if I’m working vertically I could place it on the horizontal working surface. The towel is either draped across my knee if seated, slung through a ring or one of the backpack straps, or fit onto the work surface itself.
Keep Sketchbook Nearby
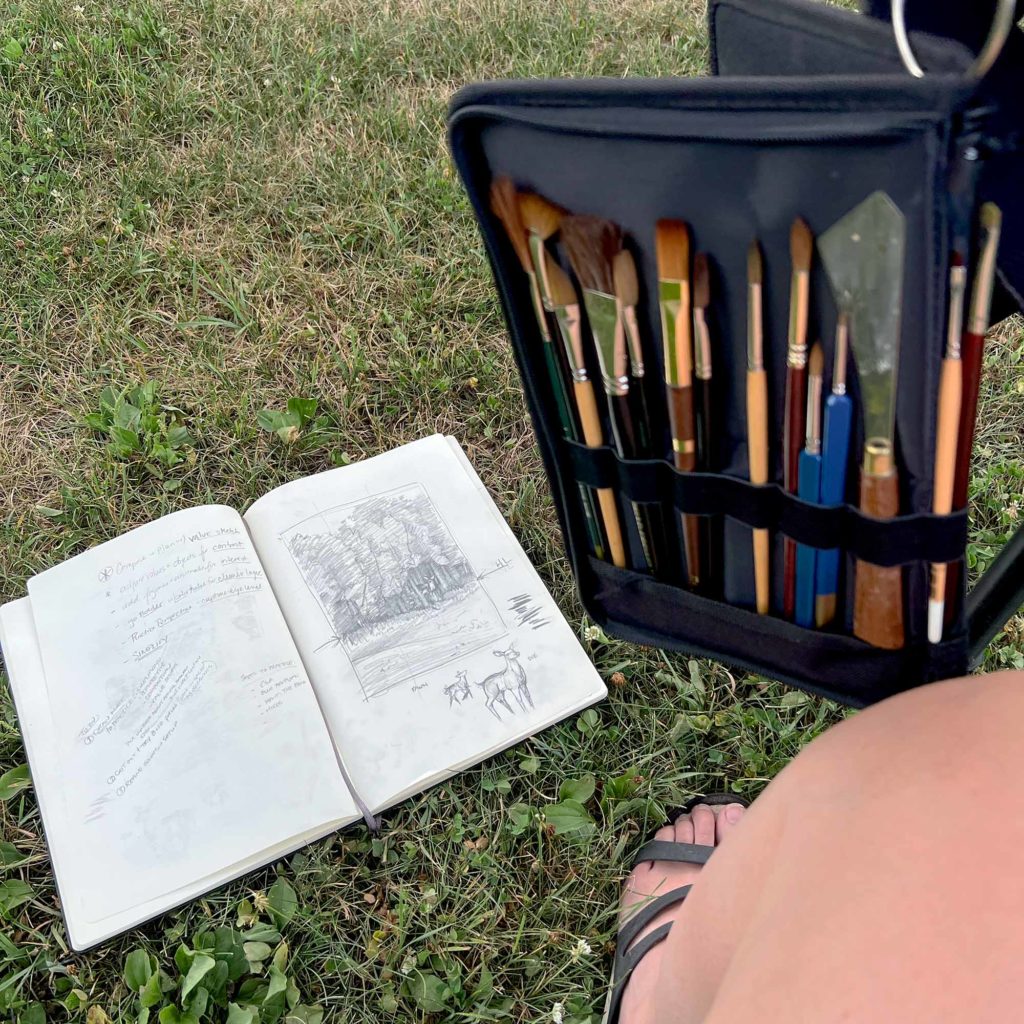
If I’m also working with a pencil sketch first, I will keep the sketchbook open nearby on the ground to refer to my value study. (Secure fluttery pages with the page clips I also keep in my portable kit!)
Paint Away!
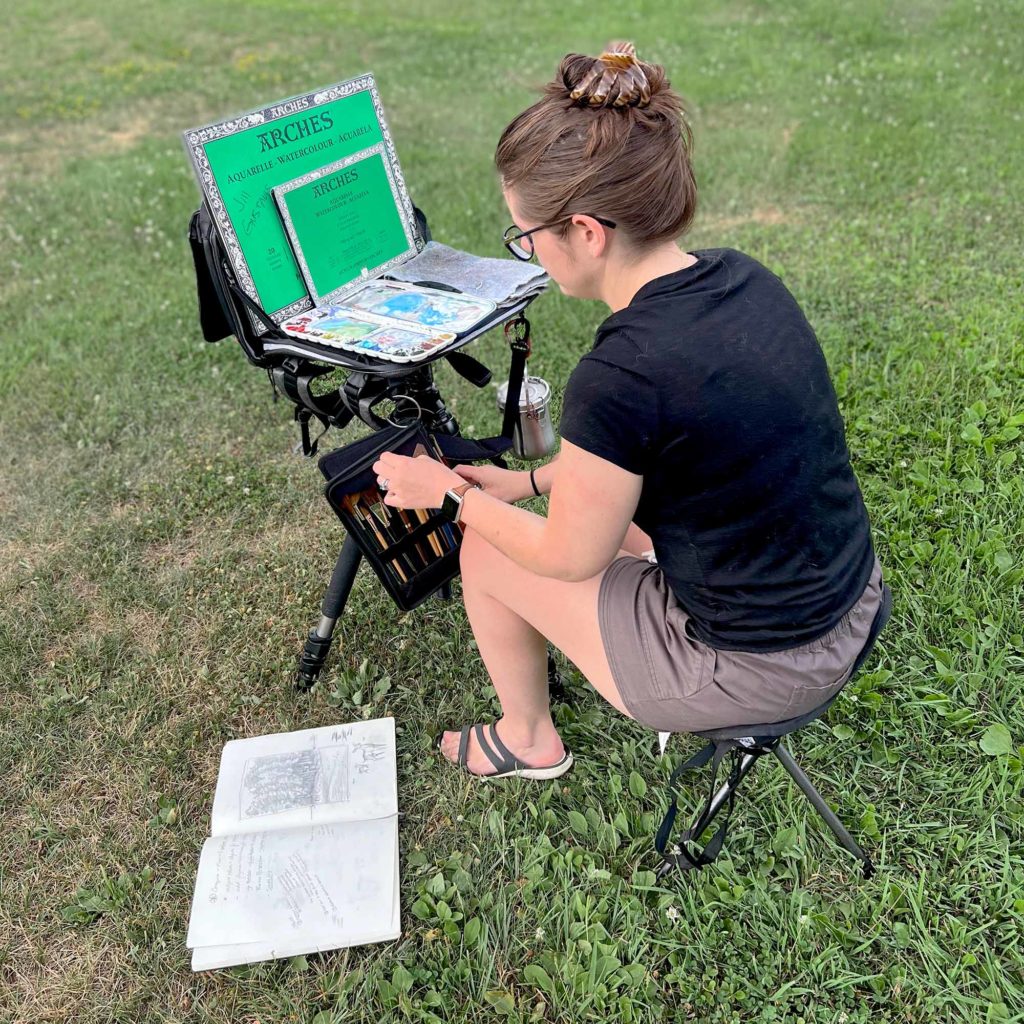
You’re ready to paint! It may sound like a lot of steps but in reality it only takes me a a minute or two to put it all together.
Break it Down
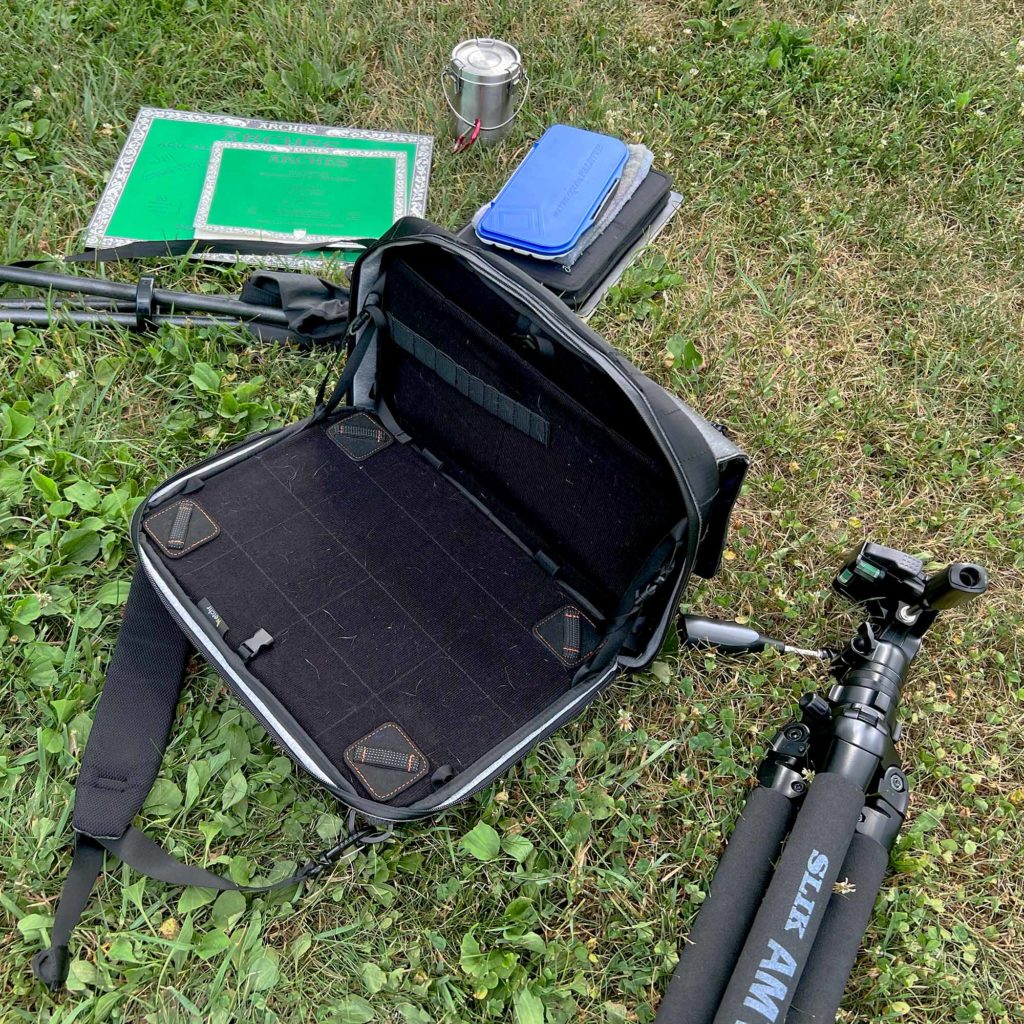
To Break it Down, reverse it! Take off loose supplies, keeping any wet paintings separate. Detach hanging supplies. Detach Satchel. Collapse tripod. Store supplies in working area and zip up. Restore supplies in front pocket. Secure tripod with straps on satchel. Affix all straps and tighten.
Head Home & Repeat!
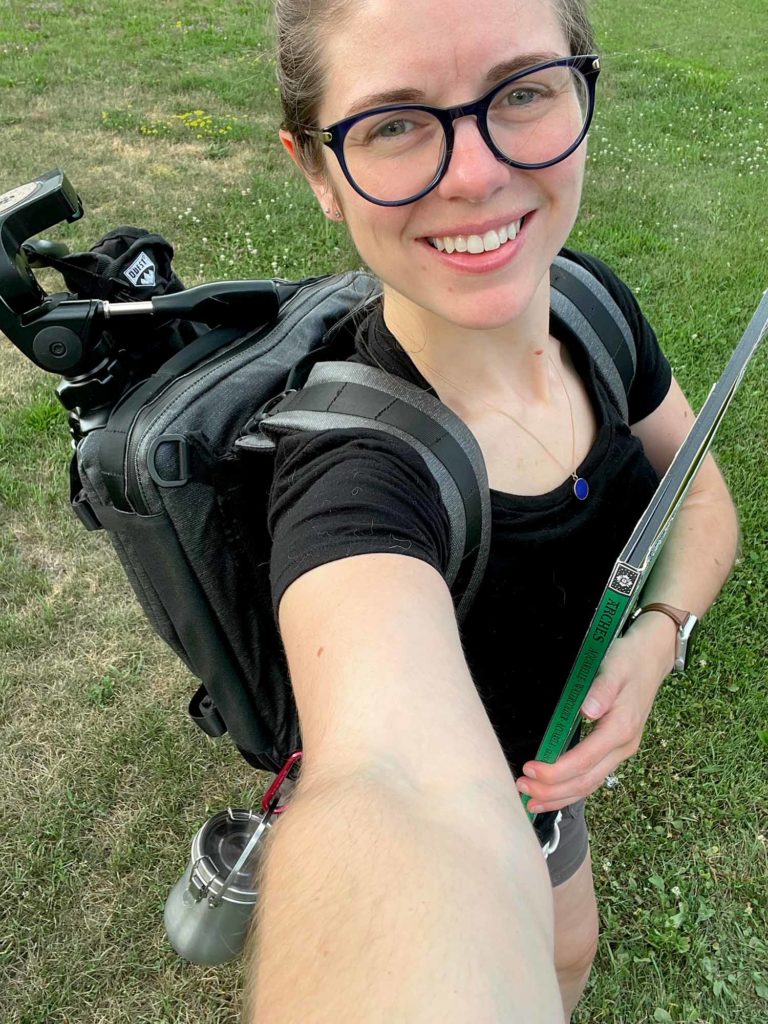
Head home a successful plein air painter! Repeat often for best results. 😉
Thoughts & Plans on my Large Watercolor Plein Air Setup
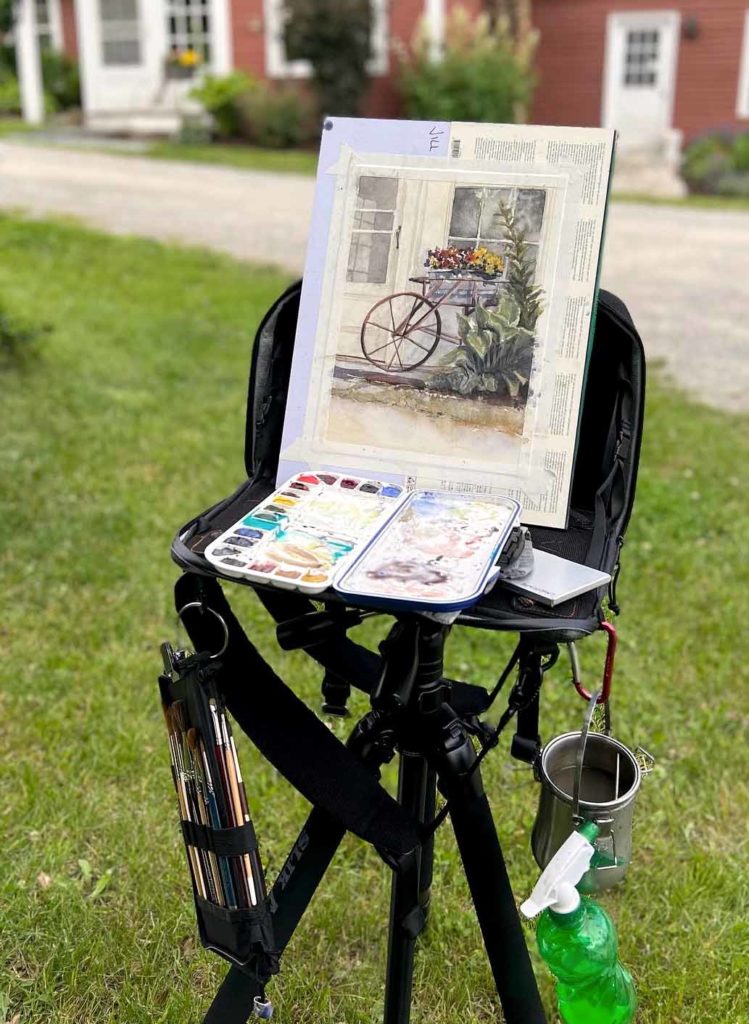
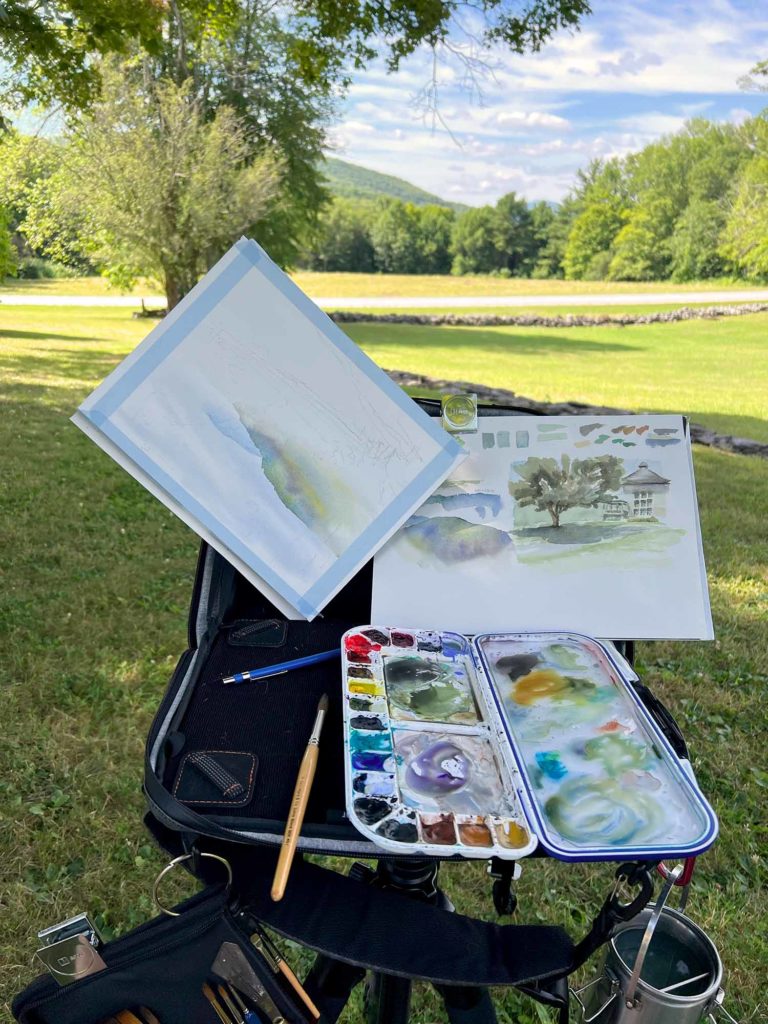
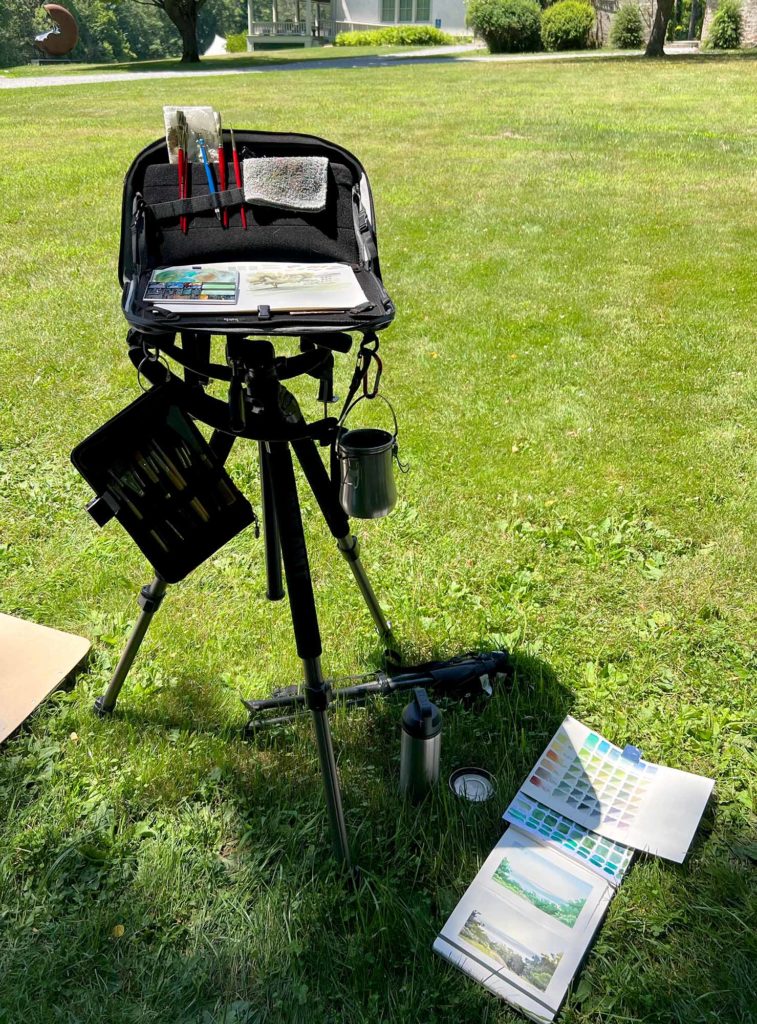
Overall, the large watercolor plein air setup I put together in June is still feeling strong. I enjoyed using it at the 4-day workshop, and have used it to teach a 2 day plein air workshop locally. The heat has prevented me from taking it out lately, but I hope to sneak it outside a few more times this year.
The biggest pro to this is the simplicity of setup, plus the weight makes it very stable on windy days. I found I could set up and break down much quicker than other artist using more traditional easels. I also wasn’t nervously clutching my block or tripod to the ground when a gust of wind blew through, letting me remain focused on whatever was quickly drying on my page.
However the weight, albeit a benefit, is also the biggest obstacle, and occasionally factors into how often I want to reach for this. For right now, the weight isn’t an issue, as long as I don’t need additional supplies. Even adding the green water bottle, which doesn’t fit into the satchel on any day, requires me to pack a supplementary bag. For now, my sessions are shorter, and not a long distance to walk, so I don’t mind hand-carrying one or two extra items. If I ever start going out for longer sessions, I don’t want to be juggling supplies. Moving forward, I may look into one of the lighter easel setups and/or a lighter tripod in order to comfortably carry other things like lunch, sunscreen, bug spray, or misc. comfort items.
Recommendations
Is this the setup for you? That depends.
If you have any issues with carrying weight, I’d volunteer a quick “no”. This pack starts outside of lightweight, and adding supplies only makes it heavier.
If the structure and simplicity make it worth a few extra pounds, theres a good chance you may enjoy the satchel and all its accompanying perks.
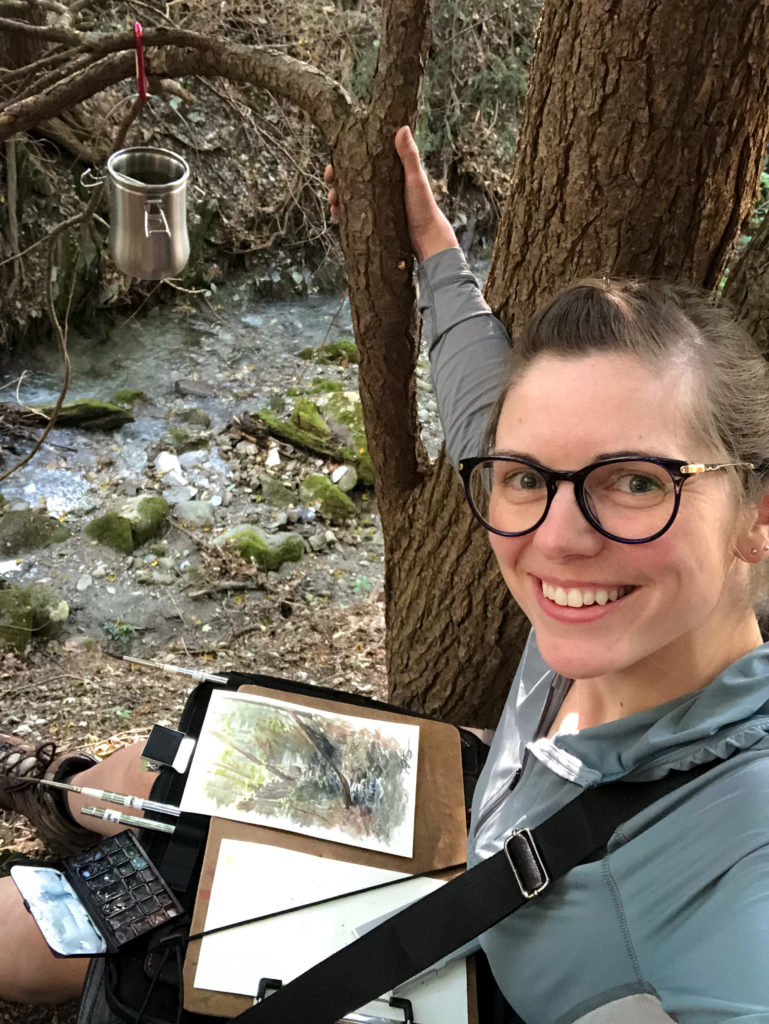
If you’re somewhere in the middle and like the structure, but maybe don’t want quite as robust of a system, there’s also a smaller-sibling to the satchel. I’d recommend looking at the Etchr Slate, which functions much like the satchel in that it can transform from bag to stable work surface using a tripod mount, but doesn’t have as many set up options (i.e. laptop mode). However, the slimmer, lighter sibling instead enables you to sling the strap diagonally to hold the surface flat at hip/lap height. This setup is also easier to bring to tough locations like perched on a tree trunk along a steep creekside!
Whatever setup you find is right for you is all down to personal choice and how you feel using it. Many times it’s balancing priorities like stability versus portability. An artist that paints large in windy areas may value weight, versus a quick-sketcher may find a more lightweight system non-negotiable. As with many aspects of art, there is no right answer, so explore and see what works for you!
Thanks for reading!
-Jill